
Configuring forms
A form is a screen used for entering data in an app. Create a form that matches the usage of your app. You can make changes to the form afterward even if it is already configured and applied to your actual environment.
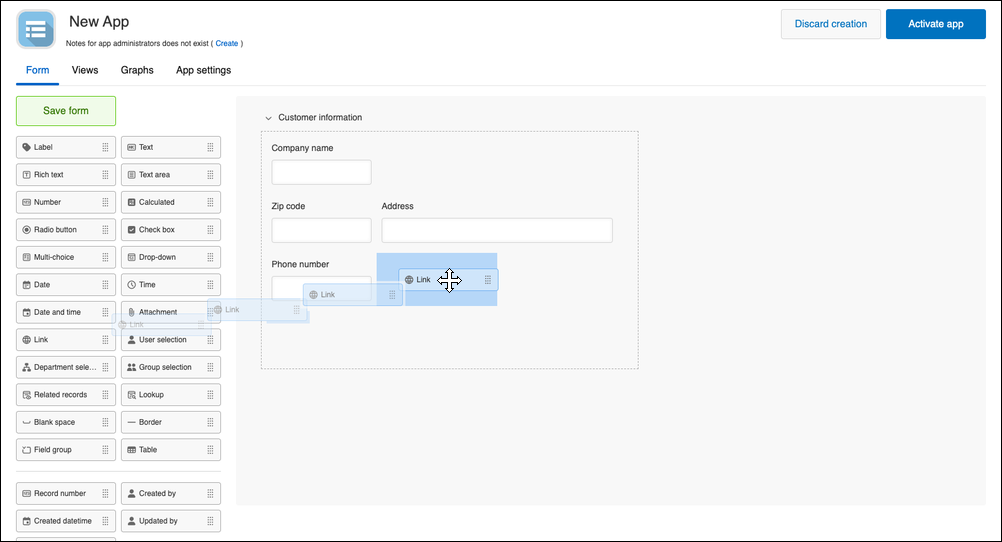
On the form settings screen, you can place fields on the form and adjust the layout of the fields with drag-and-drop operations.
Opening the form settings screen
The form settings screen can be accessed from various screens.
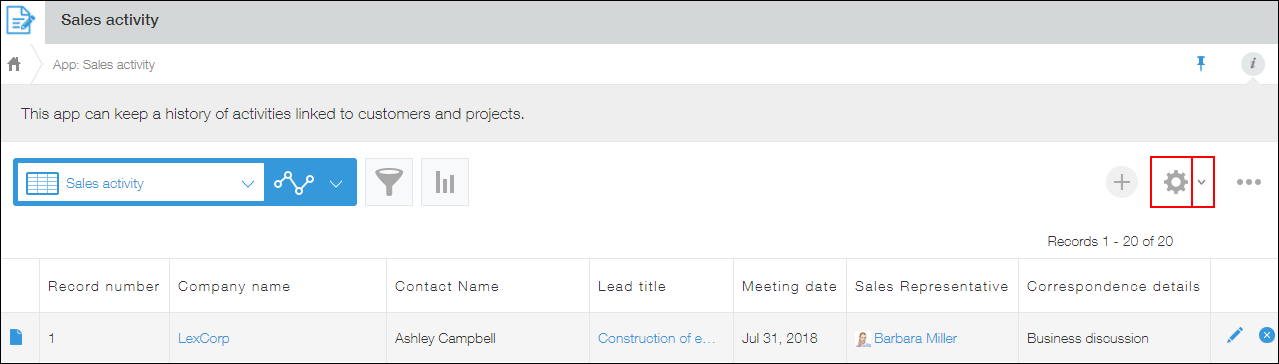
Opening the form settings screen from the "View" screen
You can open the form settings screen from the View screen in either of the following ways.
- Click the App settings icon (the gear-shaped icon) at the upper right of the screen.
- Click the App settings menu icon (the down arrow) to the right of the App settings icon, then select Form.
Opening the form settings screen from the "Record details" screen
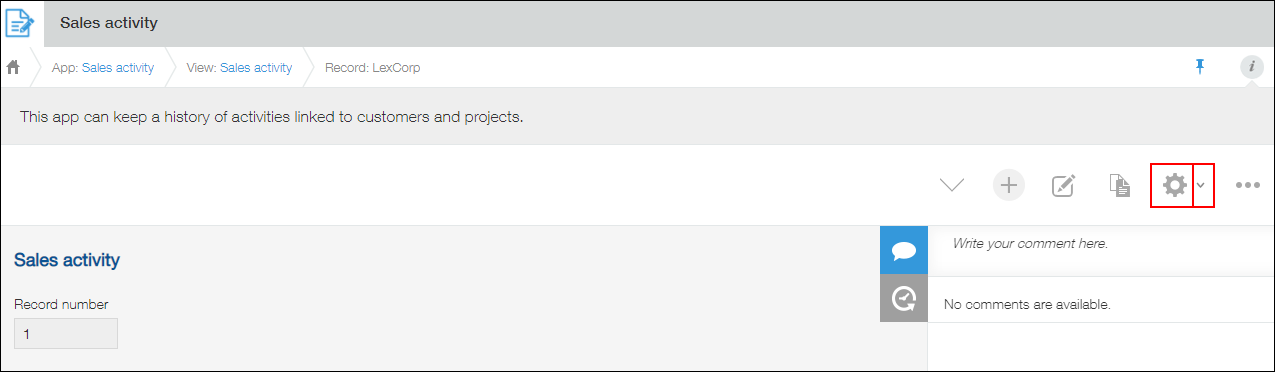
You can open the form settings screen from the Record details screen in either of the following ways.
- Click the App settings icon (the gear-shaped icon) at the upper right of the screen.
- Click the App settings menu icon (the down arrow) to the right of the App settings icon, then select Open settings of this form or Form.
Opening the form settings screen from the "App management" screen
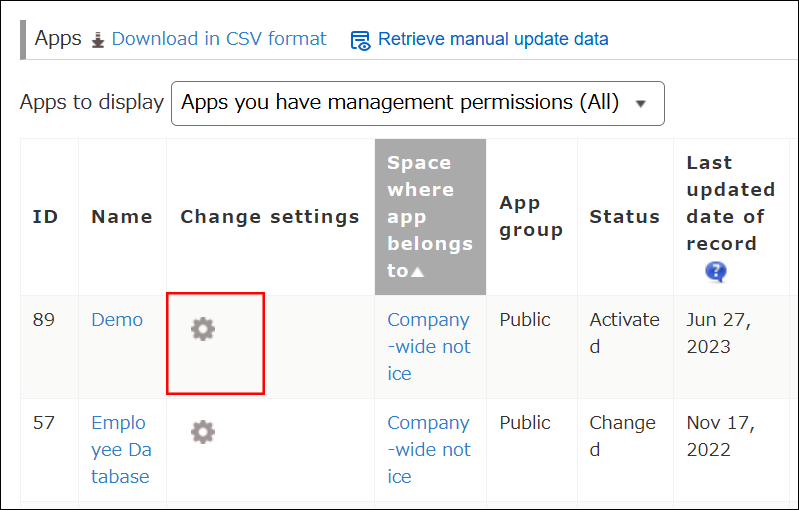
In the Apps section of the App management screen, click the Settings icon (the gear-shaped icon) to the right of the app name.
Checking apps on the "App management" screen
Placing fields of your choice on the form
After opening the form settings screen, select the fields to be placed on the form from the field list on the left side of the screen and drag and drop them to the right side of the screen.
Up to 500 fields can be placed on a form.
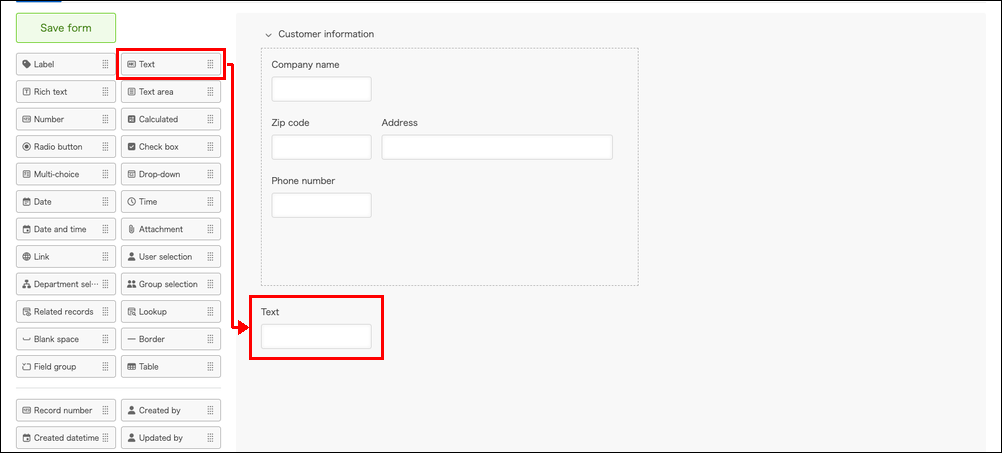
Refer to the following table when you select the fields you want to place on the form. Click on a field's link for usage examples and information on its settings.
| Usage | Field to be used |
|---|---|
| Display numbers unique to each record. | Record number |
| Display descriptions or cautions when data is being entered on the form. | Label |
| Add a blank space to the form. | Blank space |
| Display a date or time value. | |
| Add an option item to the form where only one option can be selected. | |
| Add an option item to the form where multiple options can be selected. | |
| Add an item consisted of "Yes" or "No" to the form where either one is to be chosen. | Check box |
| Enable data to be retrieved from other apps. | Lookup |
| Show the record list of an app on the form. | Related records |
| Group fields. | Field group |
| Use fields to create a table. | Table |
Changing settings of fields on the form
For each field placed on the form, you can configure settings such as the field name or whether the field entry is required.
To change the settings of a field you placed, hover your cursor over the Settings icon (the gear-shaped icon) at the top right of the field, then click Settings.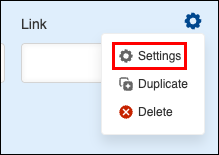
Changing position and width of a field
You can change the position or the height/width of a field with a drag-and-drop operation.
To change the position of a field, drag and drop the field to the desired position. The position where the field will be placed is indicated in blue.
You can move fields in the same row all together. Place the cursor at the left end of the row, drag the handle that appears, and drop it at the desired location.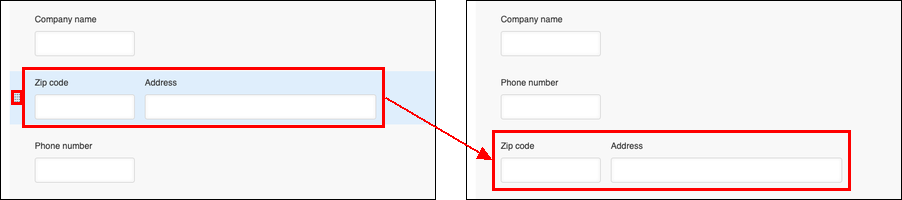
To adjust the width or height of a field, first place the cursor on the right edge or bottom edge of the field. When the arrow icon appears, drag the edge to the desired position and then drop it there.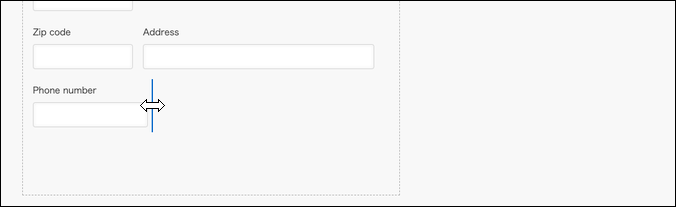
If you want to align the right or bottom edges of fields, drag the right or bottom edge of a field to the position where you want to align it. When a light blue border and a blue dashed guideline appear around the field, drop the field.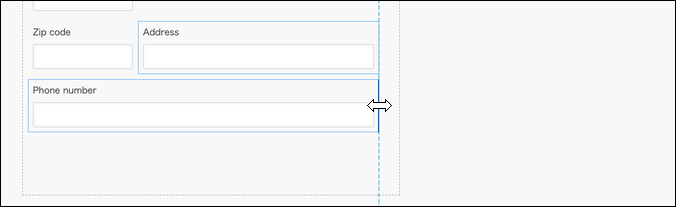
Saving a form
When you finish configuring the form settings, click Save form.
The form settings are not applied to your actual environment just by clicking Save form. To apply the form settings to your actual environment, click Update app at the upper right of the screen and click Update app in the Update app dialog.